(英語圏の読者さんも増えてきたようなので翻訳サイトに手伝ってもらって、過去の人気記事を英語版で仕上げてみました)
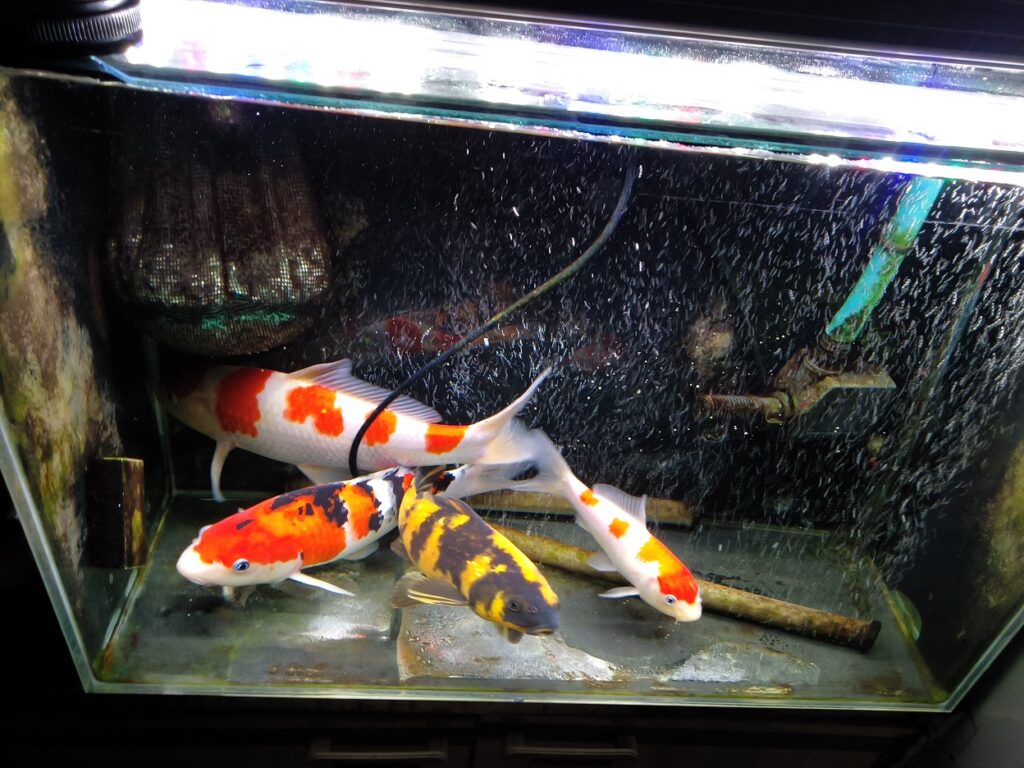
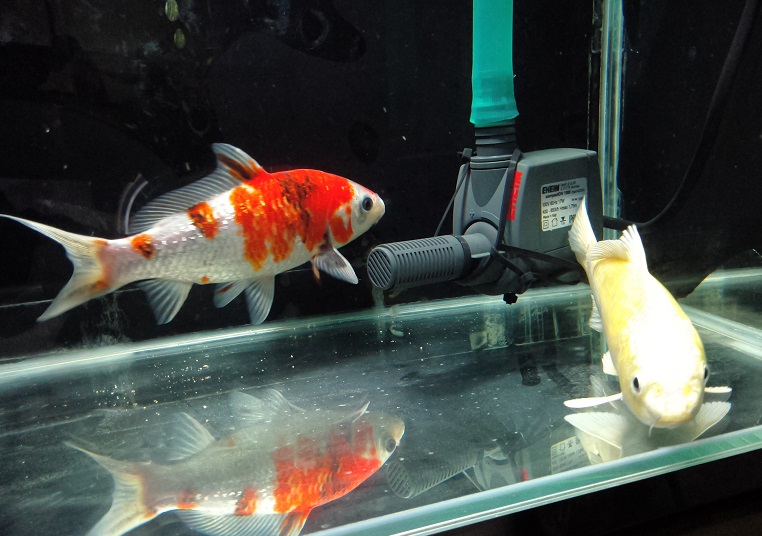
( ↑ Even though Nishikigoi, which are famous for polluting the water, are swimming here, the water is this clear.( ;∀;)!!!)
■ I have recently gained more readers from English-speaking countries, so I tried to write a translated article for them using a translation tool. There may be many places that are strange in context, but please be generous. (;^ω^) ■
Filters are one of the aquarist's most important concerns.
I am sure that everyone is trying to maintain beautiful water quality through daily trial and error.
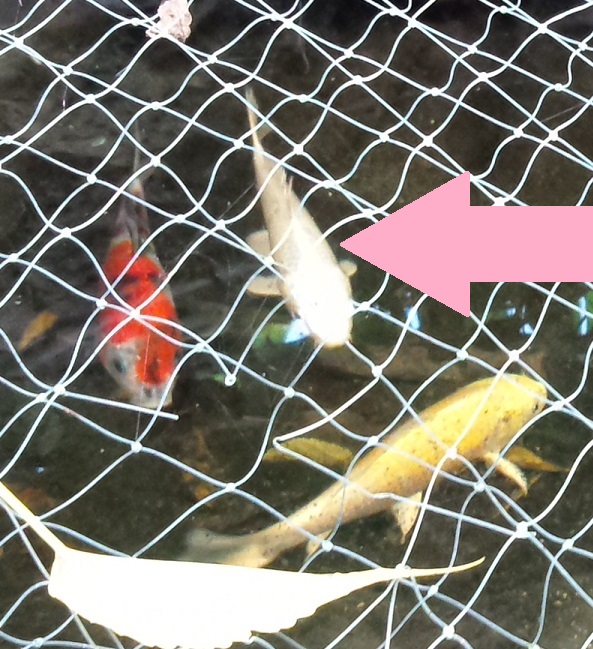
I keep small "Nishikigoi" in my aquarium.
Nishikigoi are famous for polluting water very easily among fish, so water quality control is very important.( ;∀;)

Of course, the water will be cleaner if we introduce an over-specification from among the "external filters" that are renowned for their high performance and strongest.
However, I wonder if it is possible to make a DIY dream filter that is inexpensive, super high-spec, and extremely easy to manage on a daily basis.
So, this time, I would like to DIY a cost-effective "upper filter" and sublimate it into the strongest filter that can handle all kinds of aquatic organisms that pollute the water!
The base filter is the "Grande 600", which is well known in Japan among customization enthusiasts.
(Even if you cannot obtain the "Grande 600", the basic mechanism is simple and can be applied by combining parts and devising.
If you could just refer to the technique…)
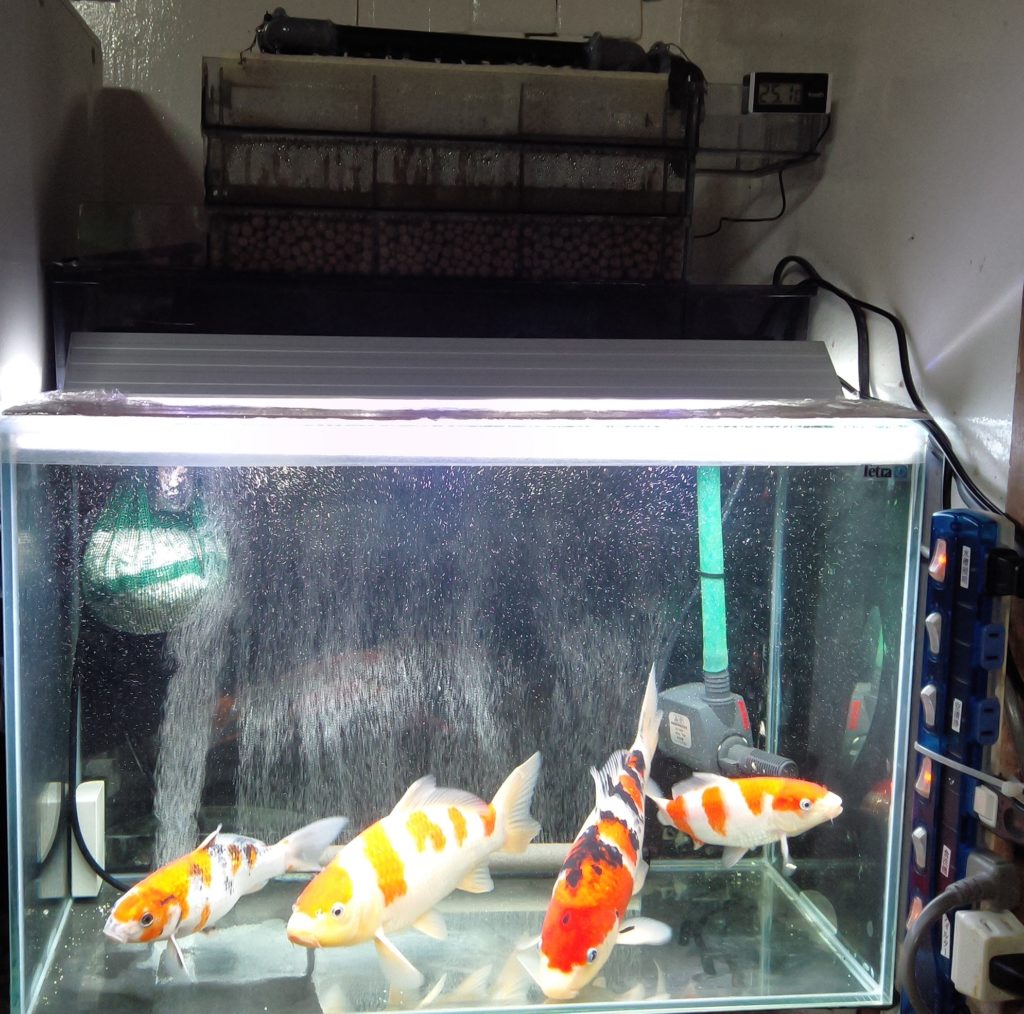
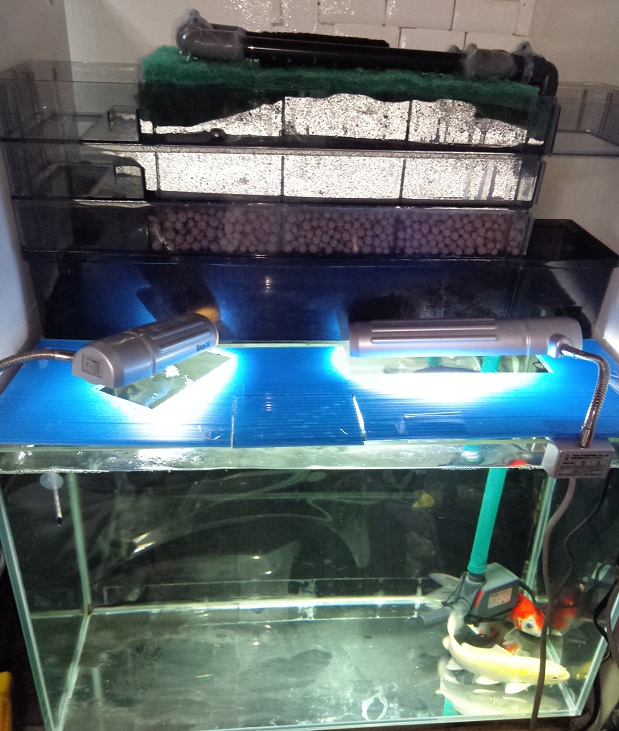
(Homemade top filter. When completed, it will look like this. It looks a little inferior, but its low price, high purification capacity, and expandability make it attractive! If you hide the top part well, there is no problem (≧▽≦)! ↓)


目次
Tried to make the water pump quieter!
The first step is to make the submersible pump quieter.
The water pump that comes standard with the aquarium filter makes an unpleasant vibration noise from the motor shaft (;^ω^)
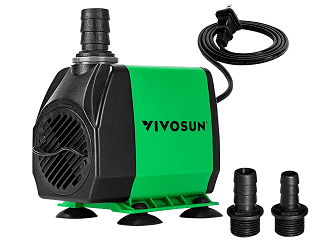
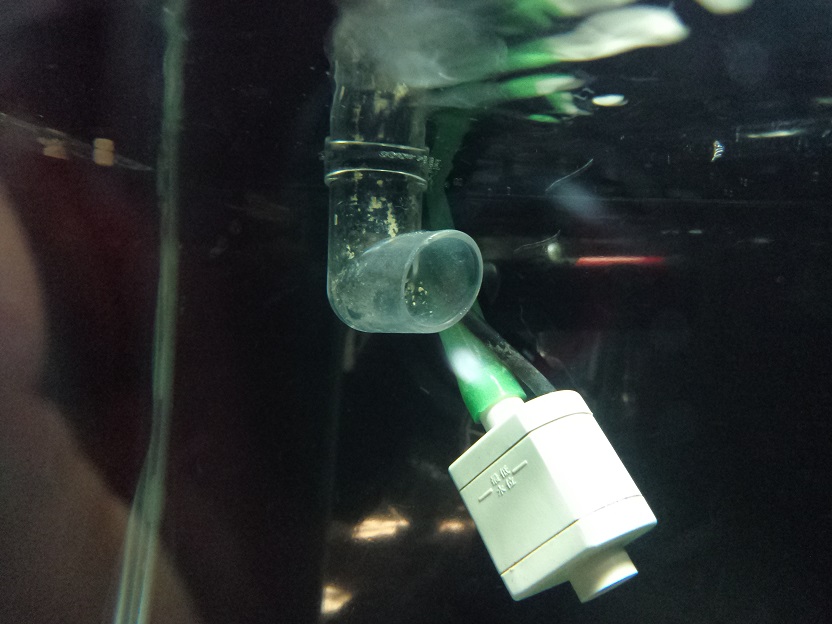
So we decided to use the small submersible pump "Rio+800" instead of the pump that came standard with the filter.
"Since the motor itself is submerged in water, won't it make a quieter sound?" I thought.
(Flow rate also increased from 10.5L/min → 11.2L/min!)
This underwater motor was initially used by adsorbing it to a glass surface with the attached suction cups.
However, the vibration of the motor caused the glass surface to vibrate and generate an unpleasant noise.
So I boldly used it hanging down and it became super quiet! ↓↓
It is hung away from the glass surface in all directions.
This has made the motor extremely quiet.
Also, for some reason, the flow rate seems to be UP more than the catalog value…(;^ω^)
Super-enhanced water purification capacity!
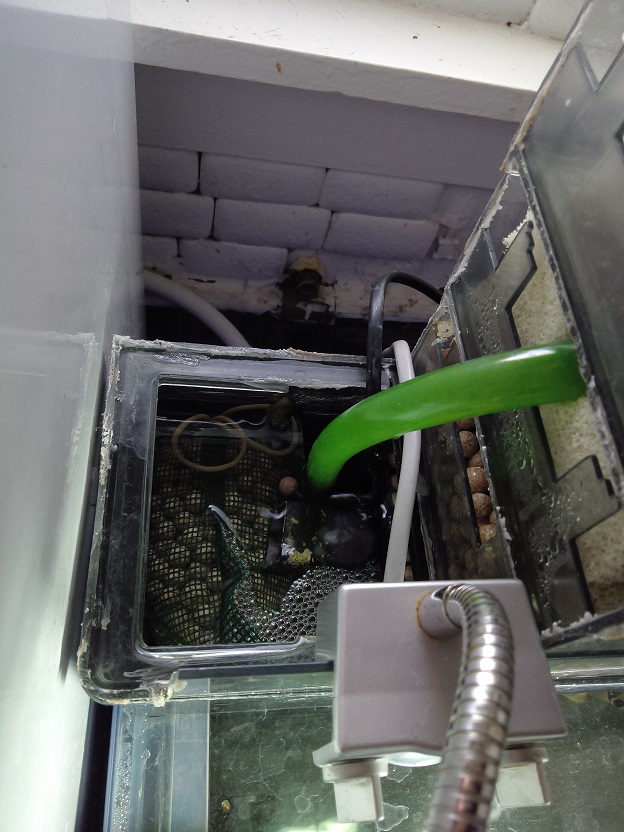
And here is the biggest showcase of this project! The strengthening of the filtration tank!
The main reason for choosing "Grande 600" for this customization was its expandability!
There is an optional product called "Wet & Dry Filtration Tank", which is really wonderful☆.
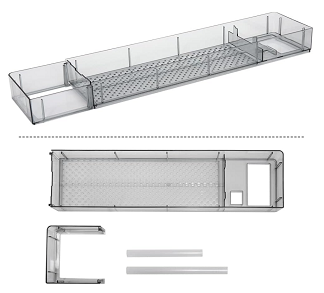
The "Grande 600" is normally a wet filtration tank, but dry filtration is easily achieved by simply stacking the "Wet & Dry Filtration Tank" on top!
And since you can stack more and more, you can accumulate an infinite number of them!(Please be careful not to overstack. (haha) )
I was overjoyed with my purchase! And I bought 3 of them! Now I can build a 4-story high-rise filter with 3 dry filtration stages in addition to 1 wet filtration stage.
The details of our resulting 4-stage filtration tank are as follows ↓↓.
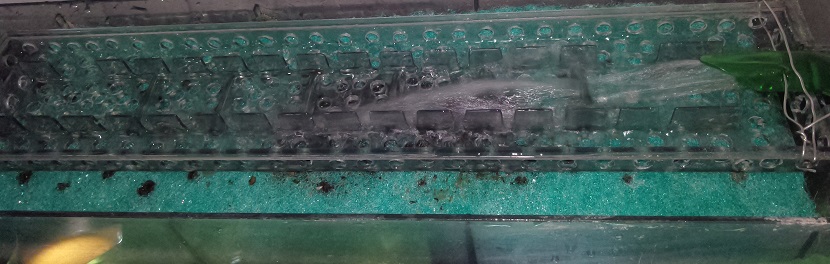
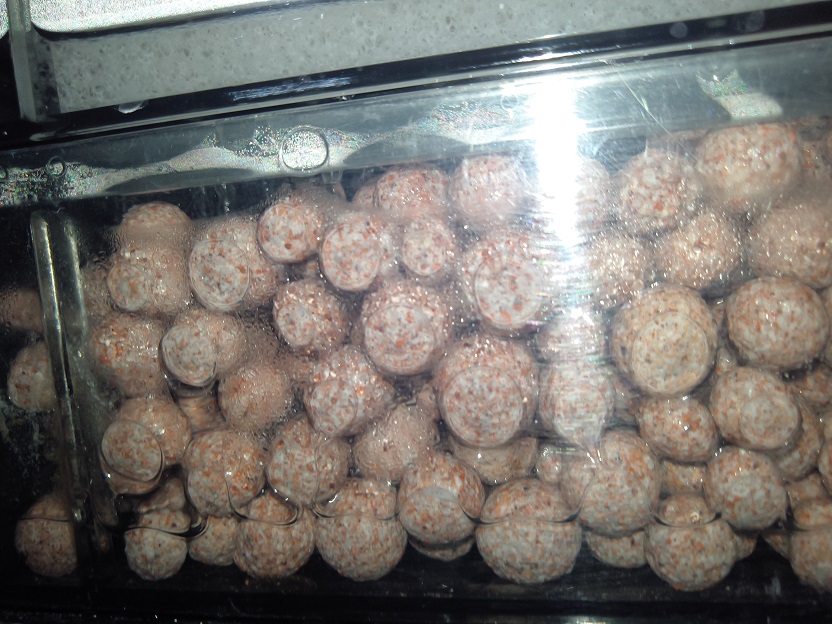
First, the bottom layer of the wet filtration tank is lined with a large amount of ring filter media, which does not clog easily even if left for long periods of time.
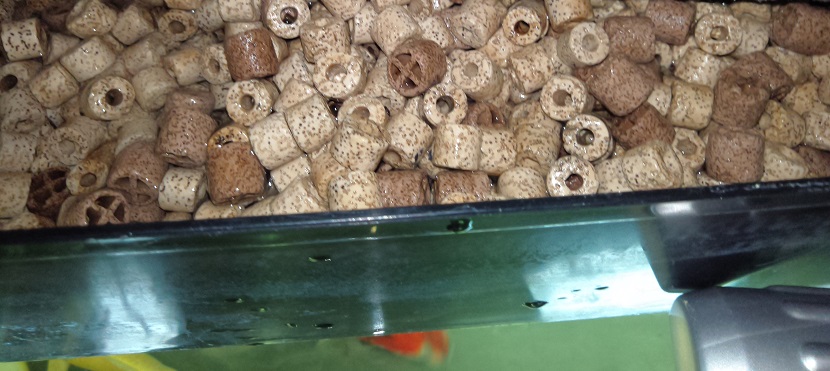
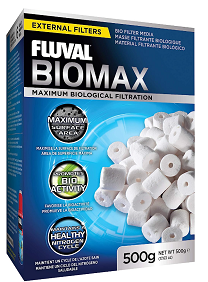
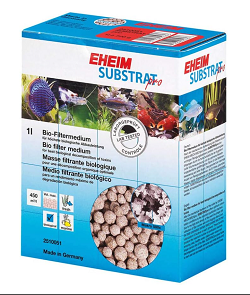
Then, pour "eheim substrate pro", the most powerful filter media for aquarists, as much as possible (≧▽≦).
In addition, I put a lot of it in the left outflow pipe area.
Here is one idea、The bottom wet filtration tank is usually only half submerged, but by filling the outflow pipe with cut and rounded plastic bottles, the water level can be raised to the maximum level.(´▽`)
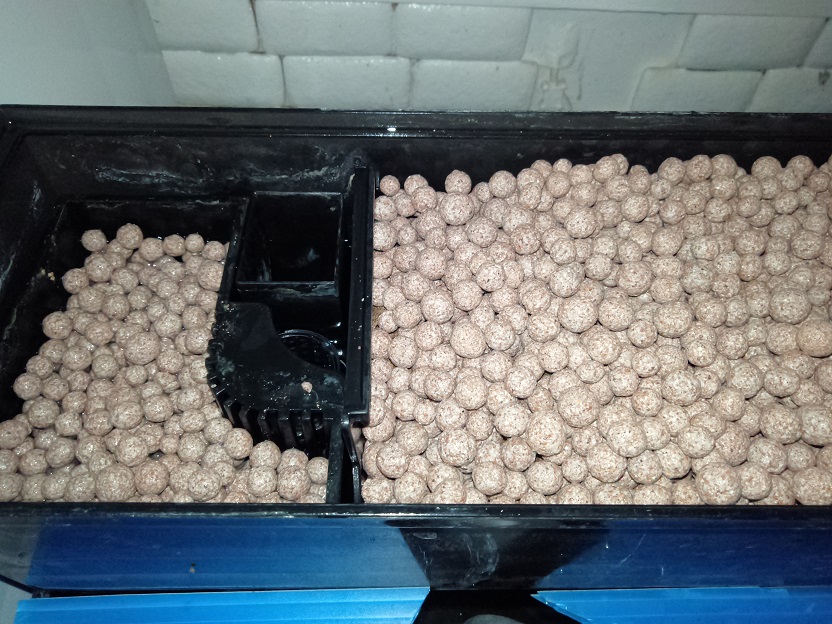
The dry filtration tank in the upper section is also filled with a large amount of "eheim substrate pro"!
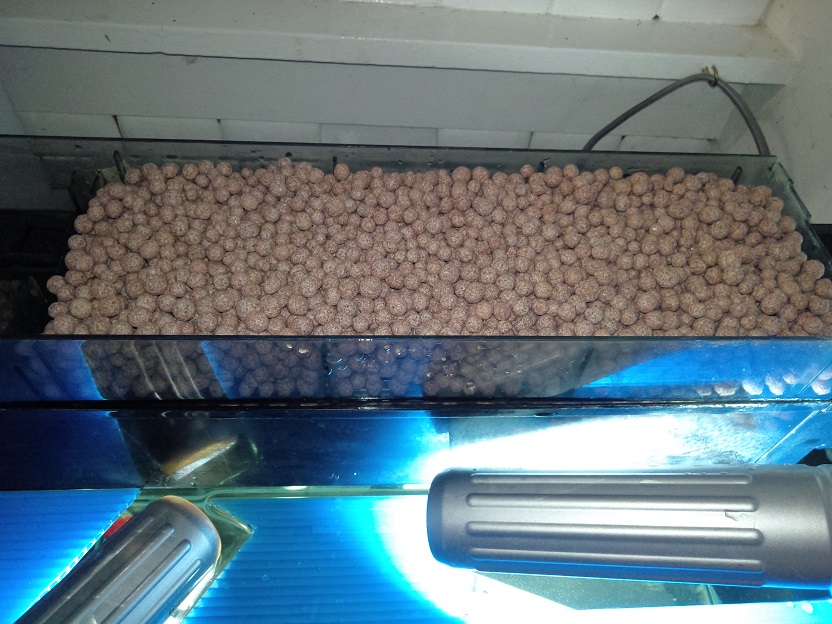
On the next level, the third layer of the dry filter tank, two sheets of mat filter material are installed on top of each other and packed tightly.(;・∀・)
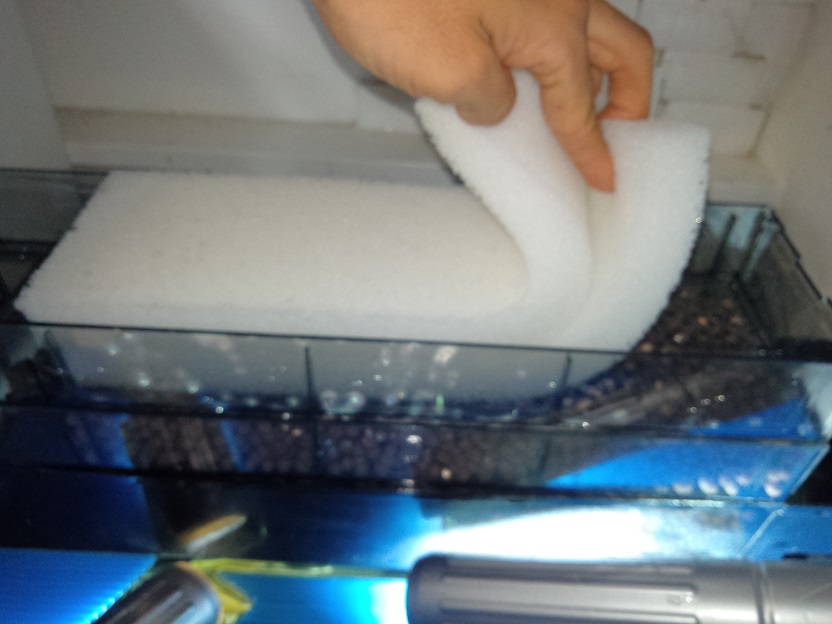
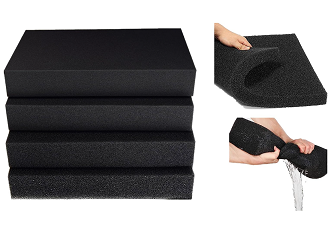
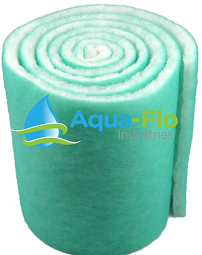
And the top layer is covered with a mat filter, with activated carbon on top of it and a coarse mat on the very top to catch large debris

By making the top layer a coarse filter material, normal maintenance is OK with just washing the coarse mat.
And the maintenance is complete by lightly washing the mat filter material just below it once a month.(≧▽≦)
The layers below the second layer hardly get dirty even without cleaning. ♪
Because it is mostly composed of biological filter material, it can be used semi-permanently and does not cost to replace.♪
I replaced the water pump with a more powerful one, so I drilled many holes in the water supply rail to improve the drainage.!
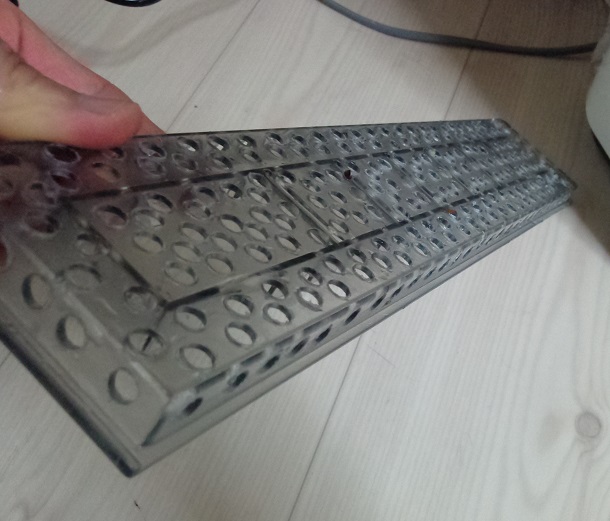
I temporarily fixed the place where water comes out with a wire.
The water doesn’t flow to the back because of the many holes I drilled. However, when keeping fish such as goldfish and koi in a tank, the water gets dirty easily, so it clogs up quickly.
In other words, this much is just right.・・(;^ω^)
I increased the amount of water in the water pump.
Thanks to stacking up the stages of the water purifier to increase its purification ability, the number and height of the filters have become quite high.(;^ω^)
I feel like the amount of water pumped has decreased due to that.・・・
It is more powerful than the water pump that came with the original filter set, but I’m starting to worry if it can cope with the water quality pollution of goldfish and koi.・・・
It might have been a big load to pump the water up to this height.(;^ω^)
So I decided to try a more powerful pump.☆
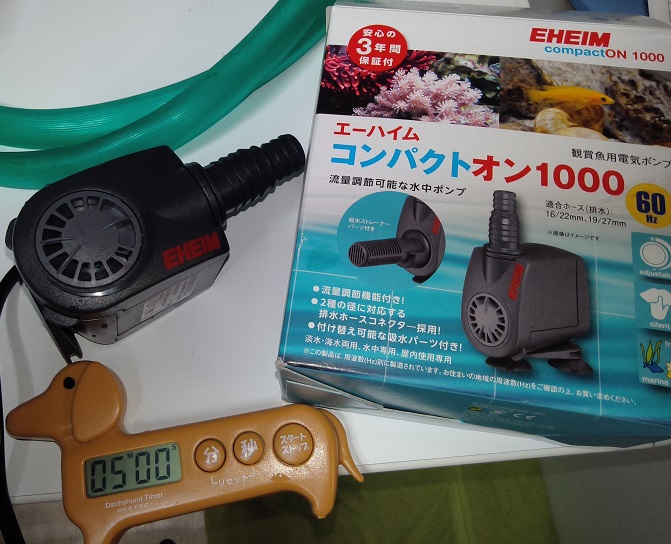
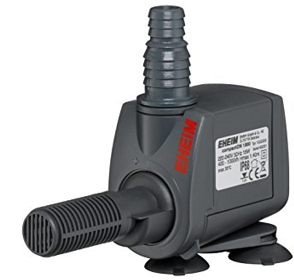
I decided to try switching to the EHEIM compactON 1000 that I’ve been interested in for a long time.!
How does the flow rate of RIO+800 compare to that of EHEIM compactON1000?
- 「RIO+800」 11.2 L/m
- 「EHEIM compactON1000」 14.17 L/m
So, if the catalog information is accurate, the power should increase by about 27%.!
I tried to replace the pump right away and the flow rate was more than I expected (;∀;) I wonder if the koi fish will get stuck to the intake… I’m getting a little worried.
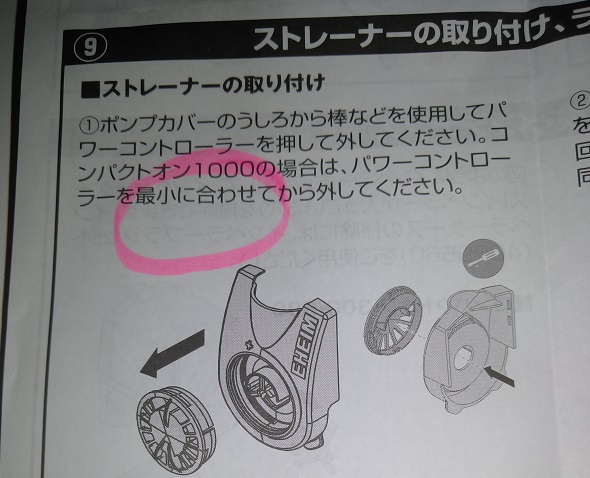
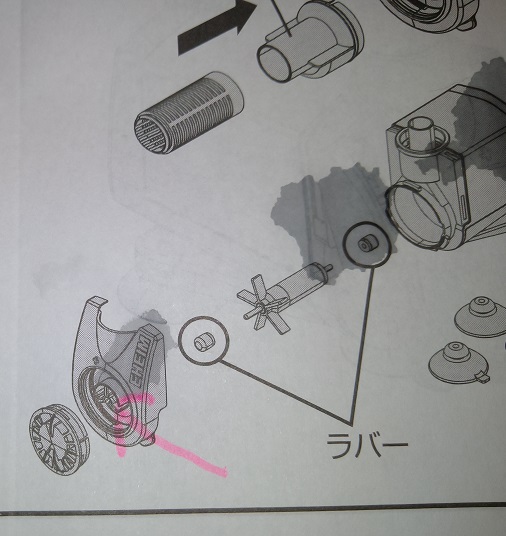
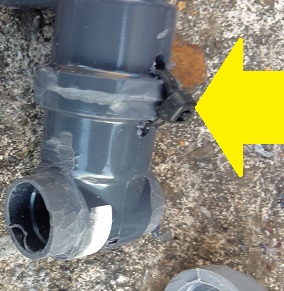
So I decided to attach the water supply strainer that came with it to ensure safety. But then an accident happened! When I removed the pump cover, the rubber bearing that supports the impeller, the heart of the pump, popped out and flew away.(;´Д`)!!
When I read the manual carefully, it clearly stated “Adjust the power controller to the minimum before attaching it”, but I foolishly attached it at the maximum. That was the cause.・・
I destroyed the new water pump before using it because of a careless mistake…
(I broke the claw that holds the bearing in place, as shown by the red arrow. ↓ )
I didn’t want to give up here, so I tried to hold the strainer by hand and turn on the power. To my surprise, it started spinning smoothly.
So I fixed it completely with waterproof locktite and test ran it! It was running without any problems (;ω) The power was strong and it was very quiet.
The koi fish seemed to like the quiet pump and they are swimming around it. (´▽`)
It looks a bit weird but I don’t care as long as it works well♪
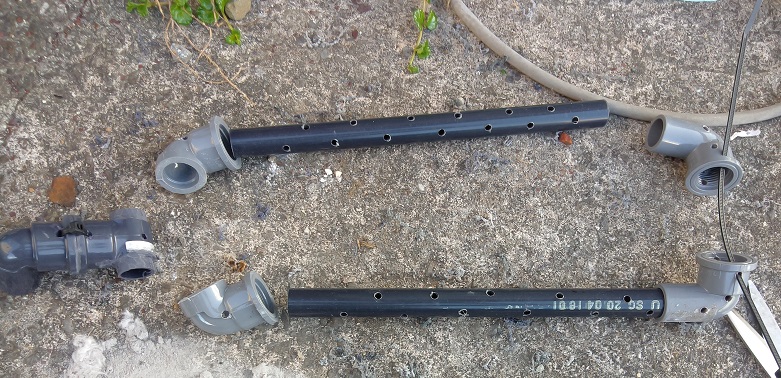
I made the water supply inlet into a shower shape.
I successfully replaced the pump with a high-output one, but then another problem came up. The water noise was too loud when supplying water (;ω) And the water splashed too much☆

So I decided to make my own shower pipe type water supply! First, I bought a vinyl pipe for water supply that was a reasonable size and cut it to fit the filter so that it could shower evenly! I also made a lot of large holes for showering to match the powerful pump! I made sure to make holes in the curved part and the back and front parts as well!
(Note, it is better to make the holes slightly smaller in the parts where the water pressure is likely to be strong, such as the curved part or the front part. The water will come out strongly only from those parts…)
As shown in the figure above, you assemble the parts that you cut and drilled. At this point, it is convenient to adjust the dimensions by grinding them with a grinder♪
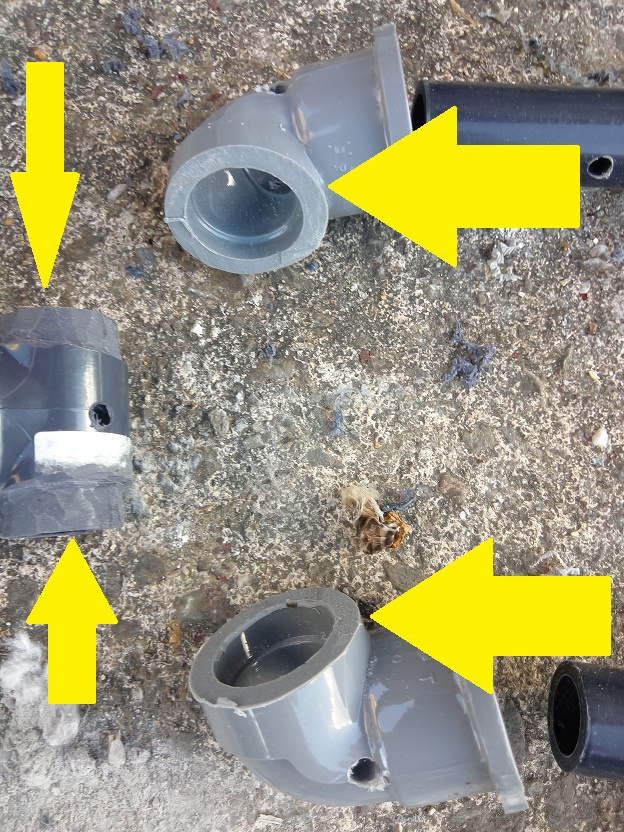
When fixing the parts, apply adhesive for vinyl pipes and then secure them firmly with waterproof locktite.
The holes that I drilled to pass the locktite will be filled with silicone caulking later.
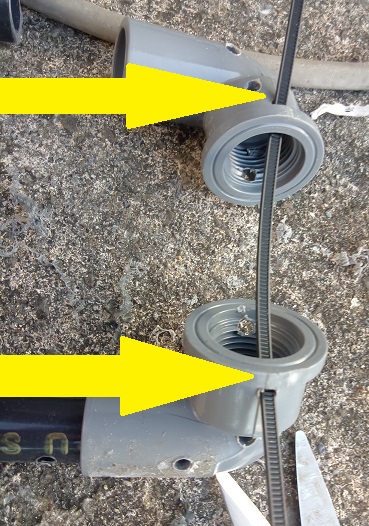
The fixing is done! Then I connected the water supply hose from the water pump and glued it with adhesive for vinyl. Then I finished it with silicone caulking for waterproofing! I also applied silicone caulking to the gaps and parts that I wanted to reinforce.

I let the silicone caulking harden for about three days and finally installed it on the filter!
It is sprinkling water evenly over the entire filter mat!
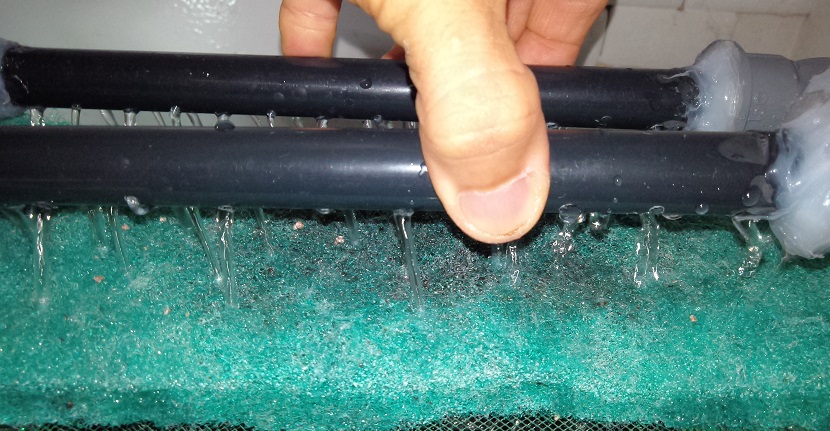
It can sprinkle water evenly over the tip and curved parts as well.

By the way, I tried to change the direction and angle of the holes so that I could evenly spray water on the filter mat (^^♪
And what’s more, the water supply sound is very quiet! Almost silent! !
Moreover, it doesn’t splash water, so I don’t need to cover the filter with a lid.
This way, I might be able to suppress the rise of water temperature by evaporation heat in summer (´▽`)
You can see that the filter media in the dry filter tank are evenly sprinkled with water and dripping ↓
I tried to streamline the water outlet.
And finally, I tackled the water outlet! That’s because the flow rate increased dramatically and it made a bubbling sound when draining the water (;´Д`) So I tried the straw trick that many aquarists have introduced, but it didn’t work very well… I felt that the diameter of the straw was too small for the flow rate, so I challenged again with a tapioca straw! And to improve the flow, I cut a slit in the lower part of it♪
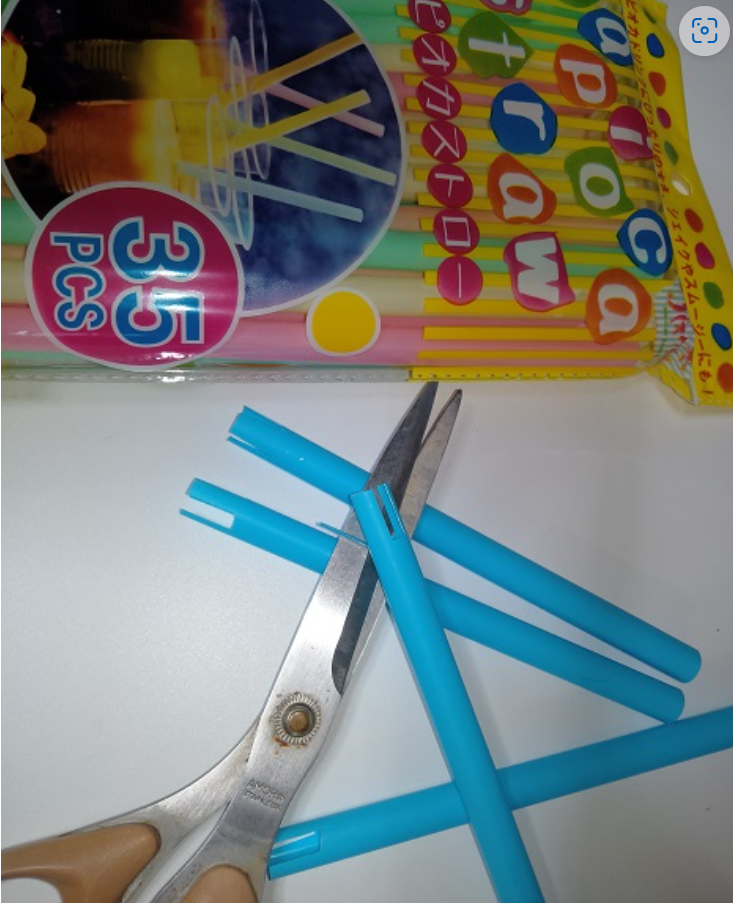
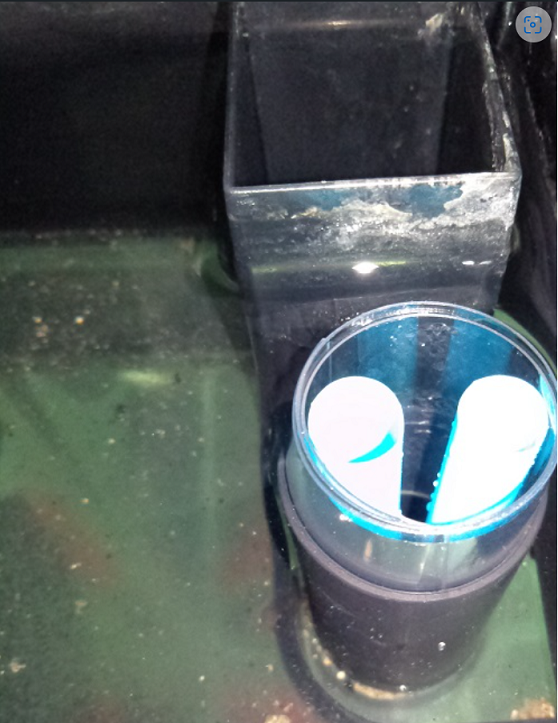
I removed the pipe that was standard-equipped for noise reduction on the filter because it couldn’t handle the high flow rate, and inserted the tapioca straw I mentioned earlier. I adjusted the number of straws to insert while running the water.
"In the end, the best solution for our filter was two tapioca straws. The air noise was eliminated!
(The transparent part at the top of the drain pipe → I cut a pet bottle and stuffed it into the drain pipe to raise the water level, so that all the filter media at the bottom layer are submerged)
There was another good thing after doing this.
The air bubbles stirred by the tapioca straws became finer at the slit at the bottom of the straw and became ultra-fine aeration!
The fine grains that are shining white are air ↓"

The aeration effect of this DIY top filter is tremendous, and thanks to the aeration effect of the shower pipe, the stacked dry filter tank, and the drain outlet, a large amount of oxygen dissolves in the water. Even koi carp, which require a lot of oxygen, were totally fine without installing an air pump! (In our case, we sometimes put aeration for landscape creation as well…)
a summary of the main points
I customized it to cope with the speed of koi carp polluting the water, but after purifying the water for about half a day after completing the DIY top filter, I noticed something… It was too over-spec (;ω) It was as clear as the world’s famous water… The koi carp looked comfortable too♪
There was an accident where I broke the “EHEIM compactON 1000” on the way, but it turned out to be a very satisfying completion! I noticed some points that bothered me a little while customizing it, so I want to improve them little by little as a future enjoyment.
postscript
(Edit 01) There was an accident in the middle of the filter modification.
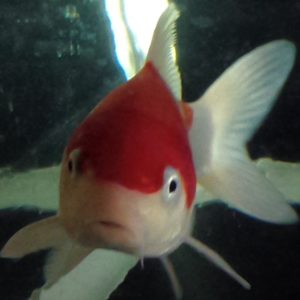
It seems that one of the three koi (silver, gold, and three-color mix) jumped out of the gap in the lid and became prey to my dog (;´Д`) When I noticed, only scales were left on the floor…('Д')!
The silver koi that was swimming happily with the other two in the pond in the garden before moving to the aquarium ↓
I ordered a special glass lid in a big hurry.
(Edit 02) I tried to release “Japanese mystery snail” into the upper filter to suppress the phenomenon that the water becomes cloudy with green color due to the growth of algae! → If you release them in the tank, the Nishikigoi will swallow them whole.
(Edit 03)
I suddenly realized that this DIY top filter idea of taking in a lot of air would put everyone in danger of oxygen deficiency if the water pump broke down and stopped…
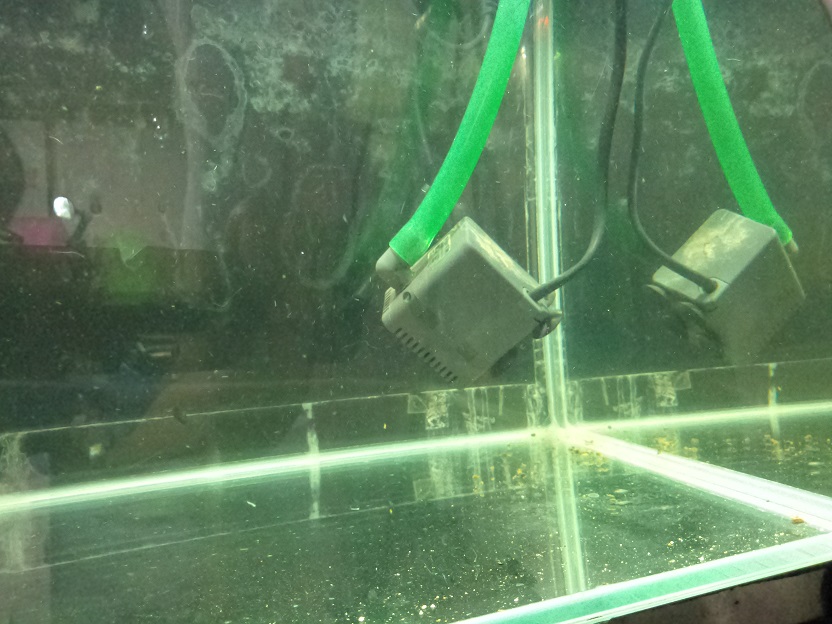
So I tried to add a custom double water pump system!
I added one small auxiliary pump (the minimum necessary power-saving one).
I used a low-power underwater motor that comes with a small hang on filter. The water pressure was weak, so I couldn’t pump it up to the top of the filter and discharged it to the second stage (it’s only for preventing oxygen deficiency when the main water pump breaks down).)
I think there is no risk of falling into oxygen deficiency immediately even if the main water pump stops with this.
(Edit 04)
About the dry filter tank, if you stack too many layers too high, you won’t be able to deliver water to the top unless you have a powerful water pump.
But if you install a large-scale water pump, the noise will be loud.
Furthermore, I’m worried that the aquarium can withstand the weight increase too much, and maintenance will be troublesome. Therefore, I think that the number of stages I introduced this time is just the best balance!
【Self-Introduction of this site's administrator】
[Advertisement]
■ “Introducing Ayakoi Farm, a specialty store delivering Nishikigoi (Koi fish) from their birthplace, Yamakoshi!”
“Over 100 years of Japanese tradition in Koi breeding and meticulous selective breeding.”
“Premium quality Koi fish available for under 10,000 yen!” ↓
